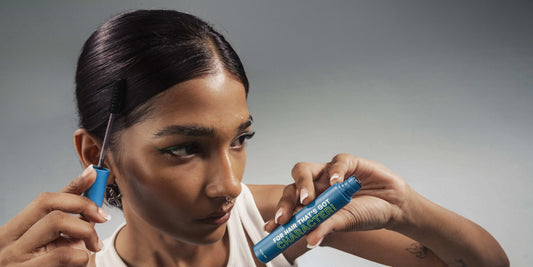
Picture this: you're scrolling through Instagram, drooling over those glossy, bouncy hair transformations that make you want to book a salon appointment immediately. But then reality hits—salon treatments can cost a fortune, and honestly, who has the time? Here's the tea: you can absolutely achieve that same dreamy, spa-fresh hair vibe right in your bathroom. A DIY hair spa isn't just about saving money (though your wallet will thank you!). It's about creating a ritual that celebrates your hair and gives it the love it deserves. Whether you're dealing with frizz that refuses to cooperate or dryness that makes your hair feel like straw, this guide will walk you through everything you need to know about how to do hair spa at home.
What Makes Hair Spa Different from Your Regular Hair Care
Let's get real about what a hair spa actually is. It's not just washing your hair with fancy products and calling it a day. A proper hair spa routine at home is like giving your hair a multi-course meal instead of a quick snack. While your regular shampoo and conditioner routine maintains your hair, a hair spa treatment goes deeper—literally. The magic happens when you combine oil treatments, steam therapy, deep conditioning masks, and scalp massage into one power-packed session. This process opens up your hair cuticles, allowing nutrients to penetrate deeper than your everyday products ever could. Think of it as the difference between drinking water when you're thirsty versus getting an IV drip when you're dehydrated.
Signs Your Hair is Screaming for a Spa Day
Your hair has its own way of telling you it needs extra TLC. If you're noticing excessive dryness, stubborn tangles that make you want to cry, or hair that feels rough even after conditioning, it's spa time. Dullness is another major red flag—healthy hair should have a natural shine, not look like it's been through a drought.
Understanding Your Hair's Specific Needs
Not all hair is created equal, and your natural hair spa ingredients should reflect that. Oily hair needs clarifying and balancing, while dry hair craves intense moisture. Damaged hair requires protein and repair, and normal hair just wants to maintain its happy state. Getting this right is the difference between a spa day that transforms your hair and one that leaves you wondering what went wrong.
Setting Up Your At-Home Hair Spa Station
Before you dive into your hair spa adventure, let's talk setup. You don't need a fancy salon chair or professional steamers, but having the right tools and ingredients makes all the difference. Your bathroom is about to become your personal hair sanctuary.
Essential Tools for Your Hair Spa
Start with the basics: a wide-tooth comb for detangling, hair clips to section your hair, and plenty of towels (trust me, you'll need them). A shower cap or plastic wrap helps trap heat during treatments. If you want to level up, a hair steamer is amazing, but a hot towel works just as well. For natural hair spa ingredients, coconut oil is your best friend for most hair types. Almond oil works beautifully for fine hair, while olive oil is perfect for thick, coarse textures. Stock up on ingredients like honey, avocado, and yogurt for DIY masks that actually work.
Pre-Spa Hair Assessment
Take a moment to really look at your hair. Is it more dry or oily? Are there areas of damage or breakage? This isn't about being critical—it's about understanding what your hair needs most. Run your fingers through different sections and notice the texture, thickness, and overall condition. Patch testing is crucial, especially if you're trying new ingredients. Apply a small amount of your chosen oil or mask to a hidden section and wait 24 hours. Your hair (and scalp) will thank you for this extra step.
The Ultimate Step-by-Step Hair Spa Routine
Now for the fun part—the actual spa treatment! This process typically takes 2-3 hours, so clear your schedule and put on your favorite playlist. Think of it as self-care time, not just hair care.
Step 1: Gentle Detangling and Preparation
Start with dry hair and gently detangle from ends to roots using a wide-tooth comb. This prevents unnecessary breakage and makes oil application much easier. Section your hair into 4-6 parts depending on thickness—this ensures every strand gets attention. Choose your oil based on your hair type. For hair spa for dry hair, coconut or olive oil works wonders. If you're dealing with hair spa for oily hair, lighter oils like almond or jojoba are better choices.
Step 2: The Magical Oil Massage
Warm your chosen oil slightly—it should be comfortable to touch, not hot. Apply it section by section, starting from the scalp and working down to the ends. The scalp massage is where the real magic happens for hair spa for hair growth. Use your fingertips (not nails) to massage in circular motions for 10-15 minutes. This isn't just relaxing—you're literally boosting blood circulation to your hair follicles. Better circulation means better nutrient delivery, which translates to healthier, stronger hair growth.
Step 3: Steam Treatment for Deep Penetration
Steam opens your hair cuticles, allowing the oil to penetrate deeper. Wrap your oiled hair in a warm, damp towel and cover with a shower cap. Alternatively, create a steam tent by leaning over a bowl of hot water with a towel over your head. Keep this up for 15-20 minutes. While you're steaming, your hair is essentially drinking up all those nourishing oils. This step is crucial for hair spa for damaged hair because it allows repair ingredients to work at the deepest level.
Step 4: Deep Conditioning Mask Application
After steaming, apply your chosen hair mask. For a simple homemade hair treatment, mix avocado, honey, and yogurt for dry hair, or use clay-based masks for oily hair. Apply generously from mid-length to ends, avoiding the roots if your hair tends to be oily. Leave the mask on for 20-30 minutes. This is the perfect time to take a relaxing bath or practice some self-care rituals.
Step 5: The Cleansing Process
Rinse your hair thoroughly with lukewarm water first, then shampoo gently. You might need to shampoo twice to remove all the oil, but be gentle—your hair is in a vulnerable state. Follow with a moisturizing conditioner, focusing on the ends. Rinse with cool water to seal the cuticles and lock in all that goodness. This final step gives you that glossy, salon-fresh finish.
Customizing Your Hair Spa for Different Hair Types
Your hair type determines everything about your spa routine—from the oils you choose to the frequency of treatments. Getting this right is the secret to consistent, amazing results.
Dry and Frizzy Hair Solutions
If dryness is your main concern, go heavy on the moisture. Coconut oil, shea butter, and honey-based masks are your best friends. Add ingredients like banana or avocado for extra hydration. Your hair spa routine at home should focus on intense moisture and cuticle smoothing. Steam treatment is especially important for dry hair—it helps the moisture penetrate deeper and last longer. Consider doing a hair spa weekly until you see improvement, then maintain with bi-weekly sessions.
Oily Hair Balance
For oily hair, the goal is balance, not stripping. Use lighter oils like jojoba or argan, and focus application on mid-lengths and ends rather than the scalp. Clay masks with bentonite or rhassoul clay help absorb excess oil without over-drying. Lemon juice and apple cider vinegar can be great additions to your routine—they help clarify without being harsh. Your hair spa for oily hair should happen every 2-3 weeks to avoid over-stimulating oil production.
Damaged Hair Repair Protocol
Damaged hair needs protein and moisture in the right balance. Protein treatments help rebuild hair structure, while deep conditioning keeps it flexible. Alternate between protein masks (using ingredients like eggs or Greek yogurt) and moisture masks. Be extra gentle during the massage phase—damaged hair is fragile and prone to breakage. Focus on scalp health to promote new, healthy growth while nursing existing strands back to health.
DIY Hair Spa Recipes That Actually Work
Ready to get your hands dirty? These homemade hair treatment recipes use ingredients you probably already have in your kitchen, and they deliver salon-worthy results.
The Ultimate Moisture Mask
Blend one ripe avocado, two tablespoons of honey, and three tablespoons of coconut oil. This combination provides intense hydration and helps repair damaged cuticles. Perfect for dry, frizzy, or chemically treated hair.
Clarifying Clay Treatment
Mix two tablespoons of bentonite clay with apple cider vinegar until you get a smooth paste. Add a few drops of tea tree oil for extra scalp benefits. This mask removes buildup and balances oily scalps without stripping.
Protein Power Treatment
Whisk two eggs with one tablespoon of olive oil and one tablespoon of honey. This protein-rich treatment helps rebuild damaged hair structure and adds strength to weak, brittle strands.
Hair Spa Benefits That Go Beyond Beautiful Hair
The hair spa benefits extend far beyond just having good hair days. Regular spa treatments improve your overall hair and scalp health, reduce stress, and give you a dedicated self-care ritual that's all about you. Scalp massage during your spa sessions improves blood circulation, which can promote healthier hair growth. The deep conditioning helps prevent future damage, saving you from costly treatments down the line. Plus, there's something incredibly therapeutic about taking time to nurture yourself.
Long-term Hair Health
Consistent hair spa treatments build up your hair's resilience over time. You'll notice less breakage, better manageability, and improved texture with regular sessions. Your hair becomes stronger and more resistant to environmental damage.
Frequently Asked Questions
How often should I do a hair spa at home?
For most hair types, once every 2-3 weeks is perfect. If your hair is severely damaged or very dry, you can start with weekly treatments until you see improvement, then space them out.
Can hair spa treatments really promote hair growth?
While hair spa treatments don't directly make hair grow faster, the scalp massage and improved circulation can create better conditions for healthy growth. A healthier scalp often means stronger, less breakage-prone hair.
Is it safe to do hair spa treatments on colored hair?
Absolutely! In fact, colored hair often needs extra moisture and care. Just avoid treatments with strong acids like lemon juice, and always do a patch test first.
What are the signs that my hair spa treatment is working?
You should notice softer, more manageable hair immediately after treatment. Over time, look for reduced frizz, better shine, less breakage, and improved overall texture.
Can I do a hair spa if I have a sensitive scalp?
Yes, but choose gentler ingredients and always patch test first. Avoid essential oils or strong acids, and stick to nourishing oils like coconut or almond oil with mild conditioning ingredients.
Final Thoughts
Creating a hair spa routine at home isn't just about saving money or time—it's about developing a deeper relationship with your hair and understanding what it needs to thrive. The key to success lies in consistency, patience, and choosing the right treatments for your specific hair type. Remember, your hair didn't get to its current state overnight, and transformation takes time. Start with monthly treatments and adjust frequency based on how your hair responds. Pay attention to what works and what doesn't, and don't be afraid to experiment with different natural hair spa ingredients. Most importantly, enjoy the process! Your at-home hair spa should feel like a treat, not a chore. Put on some music, light a candle, and give yourself permission to slow down and focus on self-care. Your hair—and your stress levels—will thank you for it. With the right approach and a little patience, you'll be amazed at what you can achieve in your own bathroom. Who needs expensive salon treatments when you can create magic at home?